Seeds and Germination
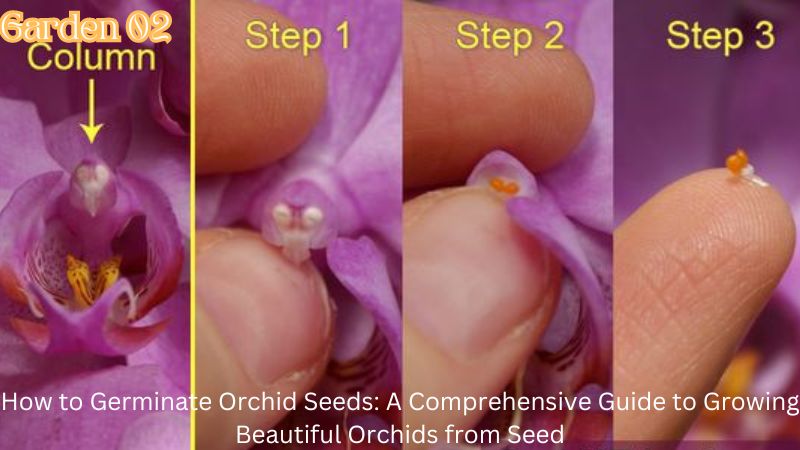
How to Germinate Orchid Seeds: A Comprehensive Guide to Growing Beautiful Orchids from Seed
How to Germinate Orchid Seeds? Orchids are renowned for their exquisite beauty and diversity, making them a coveted addition to any garden or home. While many orchid enthusiasts start with mature plants or seedlings, growing orchids from seed is an intricate but rewarding process. Germinating orchid seeds requires patience, precision, and a bit of specialized knowledge, but the results can be truly spectacular.
In this article, Garden 02 will walk you through the essential steps and considerations for successfully germinating orchid seeds. From understanding orchid seed biology to creating the ideal growing environment, we’ll cover everything you need to know to embark on this fascinating horticultural journey.
Table of Contents
Toggle1. Understanding Orchid Seeds
Before diving into the germination process, it’s important to understand what makes orchid seeds unique. Unlike most other plant seeds, orchid seeds are very small, dust-like, and lack the food reserves necessary for initial growth. Here’s what you need to know about them:
1.1. Size and Structure
Orchid seeds are incredibly tiny, often measuring less than 1 millimeter in diameter. They resemble fine dust or grains of sand. This small size is due to their lack of endosperm, which is the tissue that typically supplies nutrients to germinating seeds. Instead, orchid seeds rely on a symbiotic relationship with fungi to provide the necessary nutrients.
1.2. Germination Requirements
Orchid seeds require specific conditions to germinate, including:
- Sterile Environment: To prevent contamination by pathogens, orchid seeds must be sown in a sterile environment.
- Moisture: Constant moisture is crucial, but the medium should not be waterlogged.
- Light: Orchid seeds need light to germinate, but direct sunlight can be harmful.
- Temperature: Optimal temperature conditions vary by species but generally fall within a moderate to warm range.
2. Preparing for Germination
Successful germination of orchid seeds starts with careful preparation. Here’s how to get ready:
2.1. Choosing the Right Orchid Species
Different orchid species have different requirements for germination. Research the specific needs of the orchid species you wish to grow. Some species may have more complex requirements than others.
2.2. Sterilizing Equipment and Medium
Sterility is crucial for preventing mold and bacterial infections. You’ll need to sterilize all equipment and growing mediums:
- Containers: Use glass or plastic containers that can be sterilized in boiling water or with a disinfectant solution.
- Tools: Sterilize tools such as tweezers, spoons, and scalpel blades with rubbing alcohol or by placing them in a boiling water bath.
- Growing Medium: Choose a sterile medium like orchid seed sowing mix or agar. You can also use pre-packaged orchid seed germination kits, which come pre-sterilized.
2.3. Preparing the Growing Medium

If you’re using a DIY growing medium, prepare it according to the instructions. If using agar, dissolve it in boiling water and pour it into your sterilized containers. Allow the medium to cool and solidify before sowing the seeds.
3. Sowing Orchid Seeds
With everything prepared, you’re ready to sow the seeds. Here’s how:
3.1. Obtaining Orchid Seeds
Orchid seeds can be purchased from specialized suppliers or collected from mature orchid pods. Ensure that the seeds are fresh and viable. Older seeds may have lower germination rates.
3.2. Sowing the Seeds
Orchid seeds are incredibly small, so precision is key:
- Open the Seed Packet: Work in a sterile environment to avoid contamination. Use a clean, sterilized tool to transfer the seeds to the prepared medium.
- Distribute the Seeds: Gently sprinkle the seeds over the surface of the medium. Avoid pressing them in, as they need to remain on the surface.
- Cover the Containers: Seal the containers with lids or plastic wrap to maintain humidity and prevent contamination.
4. Caring for Germinating Orchid Seeds
Once the seeds are sown, maintaining the right conditions is essential for successful germination:
4.1. Temperature and Light
- Temperature: Maintain a stable temperature appropriate for the orchid species. Most orchids prefer temperatures between 65-75°F (18-24°C) during the day and slightly cooler at night.
- Light: Provide indirect light. Avoid direct sunlight, which can be too intense for tiny seeds. Fluorescent lights or grow lights can simulate natural light conditions.
4.2. Humidity and Moisture
- Humidity: Orchid seeds need high humidity to germinate. Keep the growing environment humid by placing containers in a humidity dome or using a humidity tray.
- Moisture: Keep the growing medium moist but not waterlogged. Use a fine mist sprayer to avoid disturbing the seeds and medium.
4.3. Ventilation
Ensure proper ventilation to prevent mold and fungus growth. If using a covered container, occasionally remove the cover to allow fresh air circulation.
5. Monitoring Growth and Transplanting
Germination can take several weeks to months, depending on the orchid species. During this time, monitoring and care are crucial:
5.1. Observing Seedlings
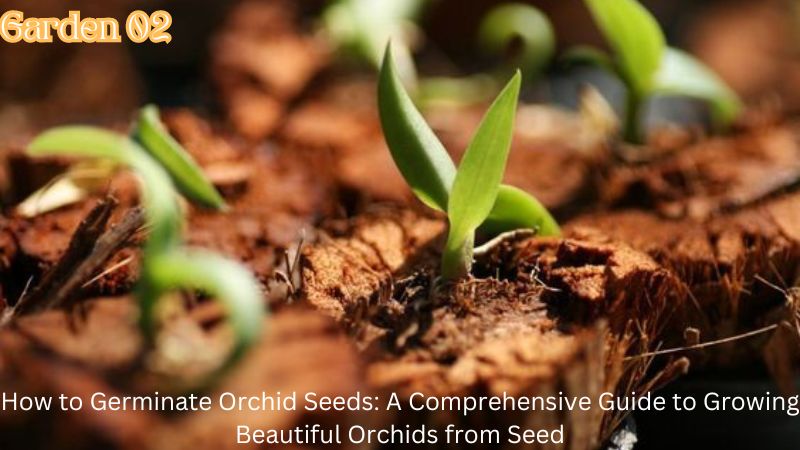
Once the seeds begin to germinate, they will form tiny green structures known as protocorms. These early seedlings are delicate and require careful handling.
- Protocorms: These are the first stage of orchid seedling development and will eventually develop into small, recognizable orchids.
- Healthy Growth: Ensure that the protocorms are developing without signs of mold or disease. Adjust environmental conditions if necessary.
5.2. Transplanting Seedlings
When the seedlings are large enough to handle (usually several months to a year after germination), they can be transplanted into individual pots or trays:
- Prepare Pots: Use small pots filled with a well-draining orchid mix.
- Handling Seedlings: Gently separate and transplant each seedling into its new pot, ensuring that the roots are properly positioned.
- Acclimate Seedlings: Gradually acclimate the transplanted seedlings to new conditions by slowly increasing light exposure and reducing humidity.
6. Challenges and Solutions
Germinating orchid seeds can be challenging. Here are common issues and how to address them:
6.1. Mold and Fungal Issues
Mold and fungi can inhibit seed germination and seedling development. To combat this:
- Sterilize: Ensure all equipment and media are sterile.
- Ventilation: Improve air circulation and avoid overwatering.
6.2. Low Germination Rates
Not all orchid seeds will germinate. To improve germination rates:
- Fresh Seeds: Use fresh, high-quality seeds.
- Optimal Conditions: Maintain consistent temperature, humidity, and light.
6.3. Pests and Contamination
Pests like gnats or contaminants can harm seedlings. To prevent this:
- Monitor: Regularly check for pests or contamination.
- Clean Environment: Keep the growing area clean and sterile.
7. Long-Term Care and Maintenance
Once your orchids have been successfully germinated and transplanted, ongoing care is essential for their continued growth and health:
7.1. Watering
Water orchids with distilled or rainwater to avoid buildup of salts and minerals. Allow the growing medium to dry slightly between waterings.
7.2. Fertilization
Feed orchids with a balanced orchid fertilizer according to the manufacturer’s instructions. Typically, orchids benefit from regular but diluted feedings.
7.3. Repotting
Repot orchids every 1-2 years to refresh the growing medium and provide adequate space for growth. Choose a pot that allows for healthy root development.
7.4. Monitoring for Pests and Diseases
Regularly inspect orchids for signs of pests or diseases. Common issues include aphids, scale, and fungal infections. Address any problems promptly to ensure healthy plant growth.
8. Conclusion
Germinating orchid seeds is a fascinating and rewarding process that requires careful preparation, precise conditions, and patience. By understanding the unique needs of orchid seeds, preparing a sterile environment, and providing appropriate care, you can successfully grow orchids from seed and enjoy the beauty and diversity of these remarkable plants.
Whether you’re an experienced orchid grower or a curious beginner, mastering the art of orchid seed germination opens up new possibilities for expanding your collection and deepening your appreciation for these exquisite flowers. With dedication and attention to detail, you’ll be well on your way to cultivating your very own stunning orchids from seed.


